Presets
Thry Editor allows you to create, apply, and save Presets for Materials using Poiyomi Shaders. Presets are fetched from Materials in a Project that are marked with isPreset: true.
Using Presets
The Presets List can be summoned by pressing the Presets button.
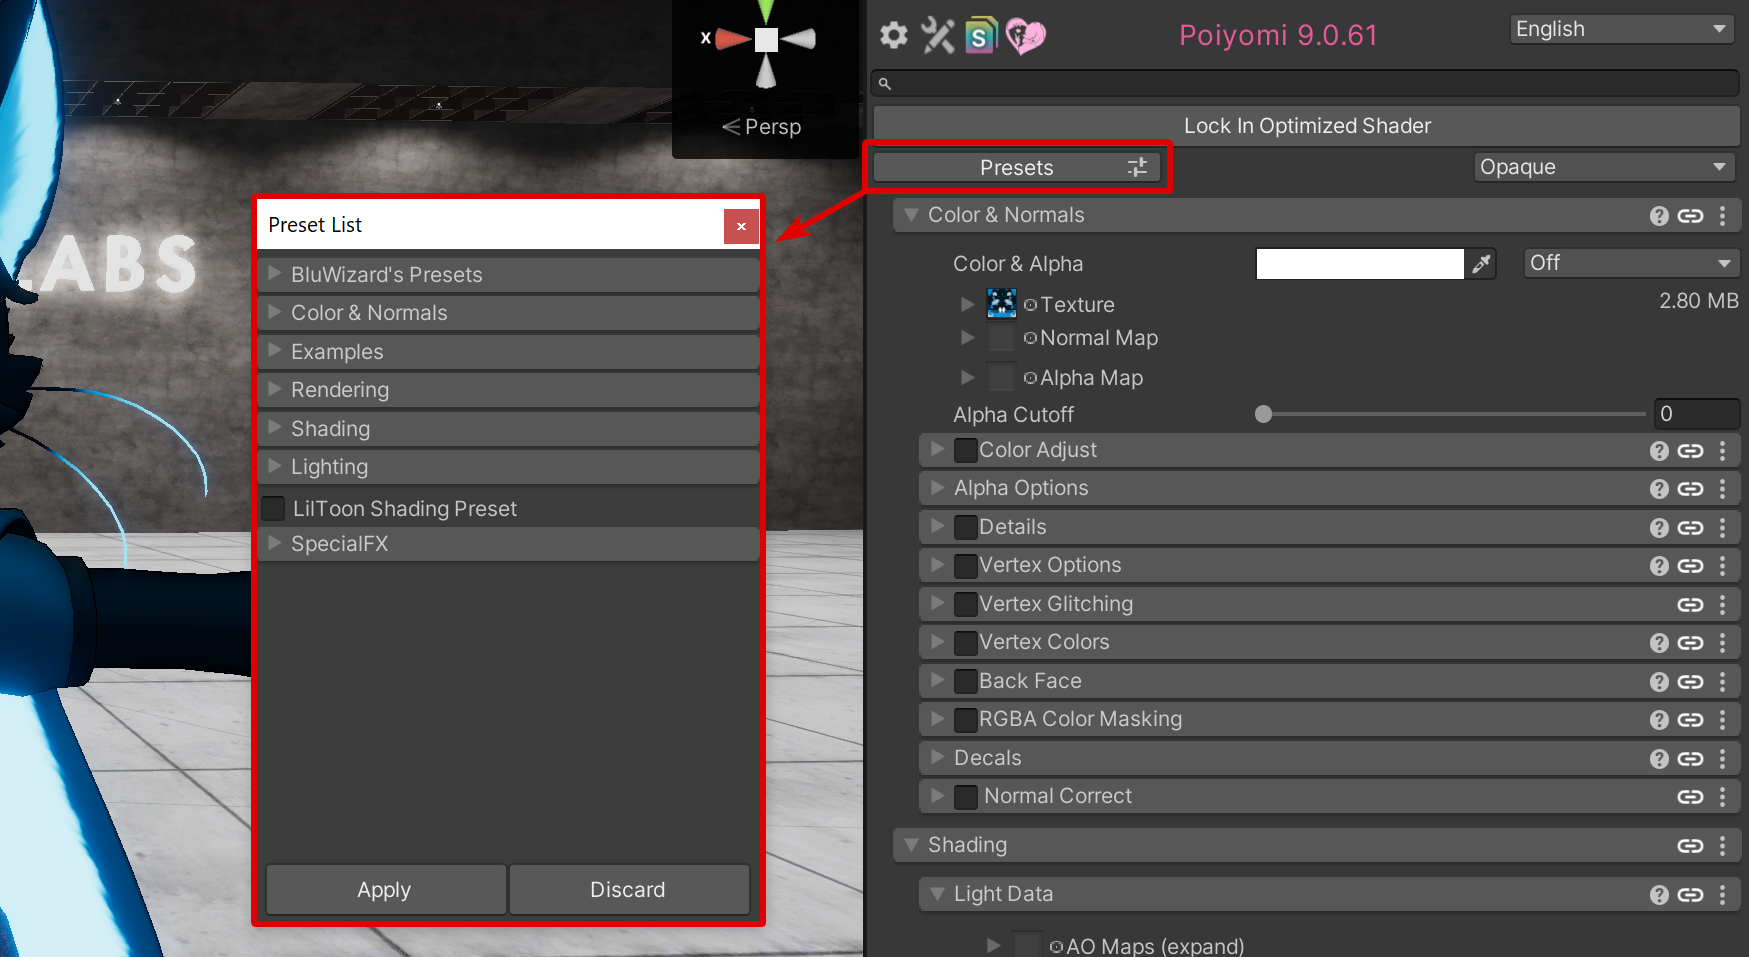
From here, you will see a few categories. Some of these are included by default. Any Presets you create will be listed in here as well.
Applying a Preset
To apply a Preset to your Material, click the Checkbox next to the name of the Preset in the list. When you do this, the Material will update with a preview of your changes.
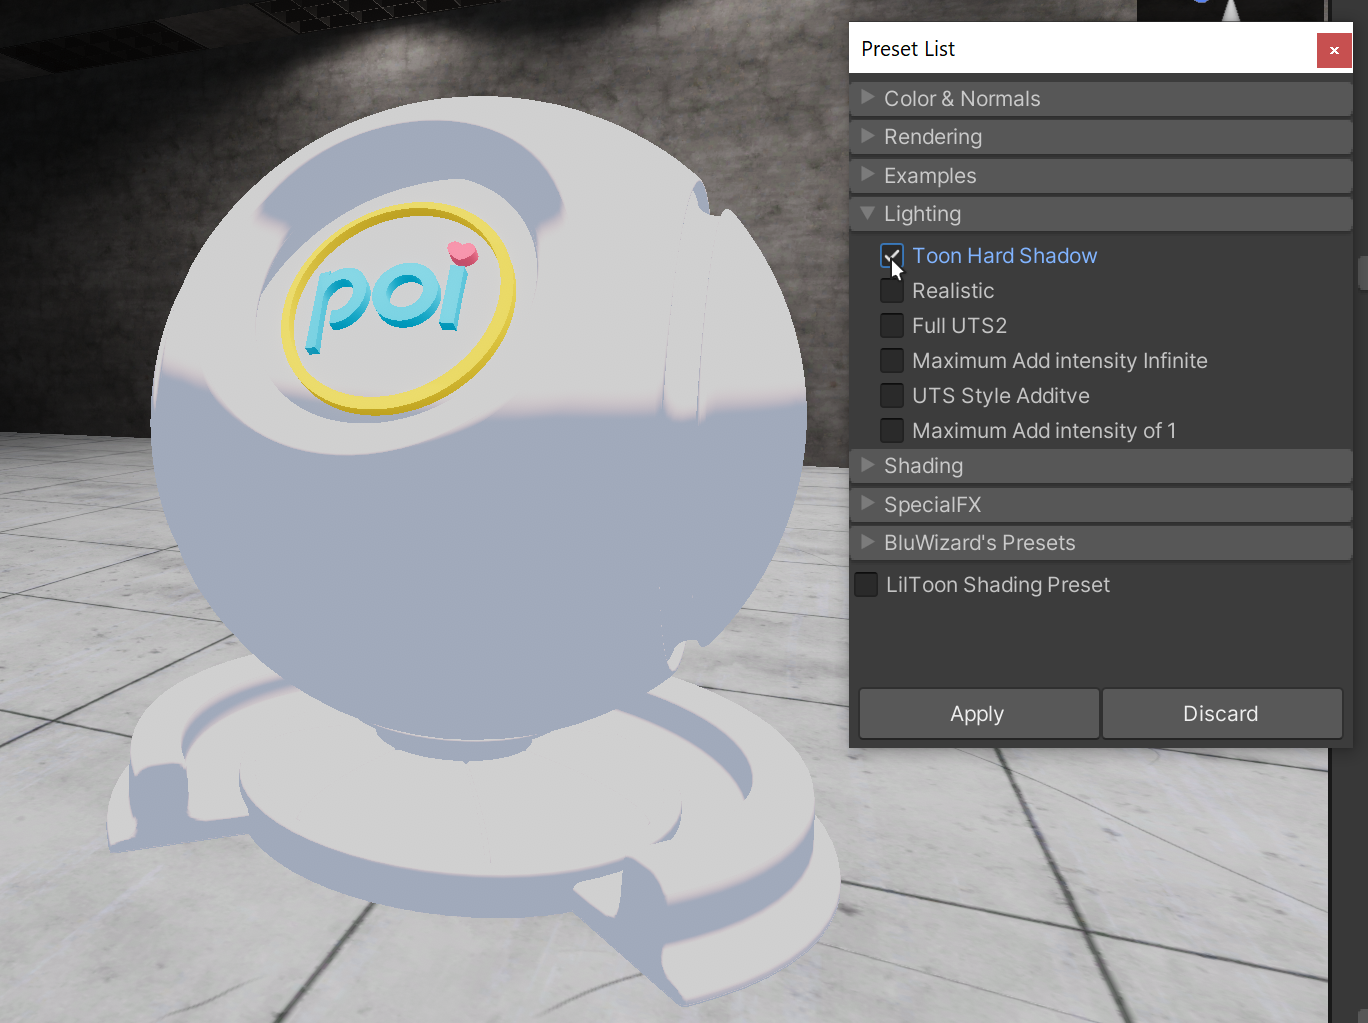
In this example, we are selecting a Preset called Toon Hard Shadow located in a category under Lighting. This Preset in particular adjusts some Shading settings.
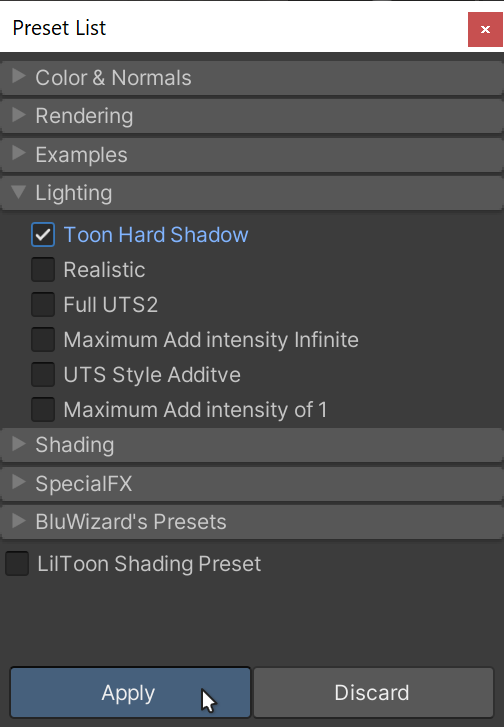
If you are happy with the changes this Preset makes, click the Apply button to confirm your changes. This saves the settings you applied and closes the window.
Although if you are not satisfied with the settings it applied, you can un-check the Preset and choose a different one. Or you can close the Preset List without applying any settings by clicking the Discard button.
How to Create a Preset
Creating your own Presets is very easy to do. By doing this, you can save yourself a few clicks with a workflow of consistent settings you use very often without having to copy and paste them every so often.
Getting Started
It is recommended you use a Material you are NOT using on your Avatar for your Presets, as the Material needs to be Unlocked in order for the Preset System to read your settings.
- Begin by creating a fresh Material in your files by
Right-Clickin your Project Files, name it, then change the Shader to.poiyomi/Poiyomi Toon. - On your newly-created Poiyomi Material, Click on the Tools icon and checkmark the option
Is Preset.
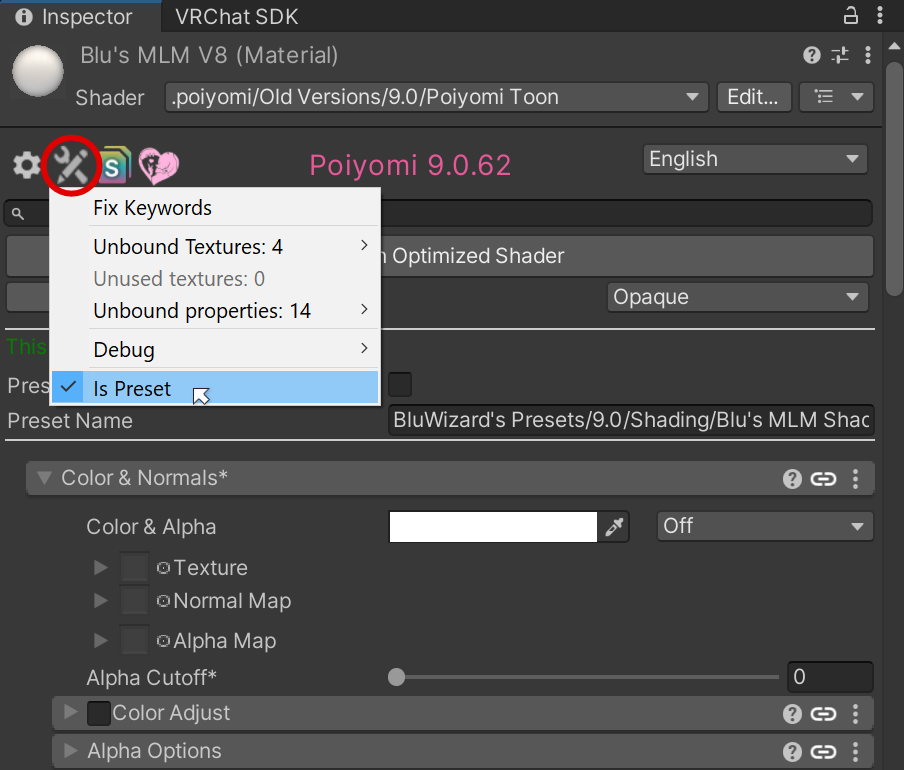
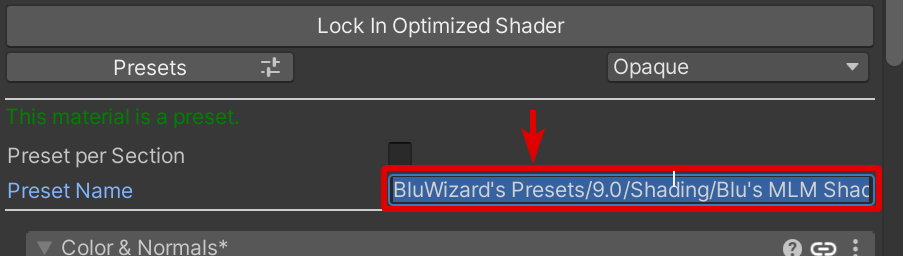
- After doing so, you should now see some fields appear. A green text explaining "This material is a preset" will appear.
- Name your Preset in the
Preset Namefield. This determines how it appears in the Preset List. Forward slashes "/" will indicate sub-categories.
Once you reach this part, you are now ready to start marking properties on the Material that you just marked as a Preset.
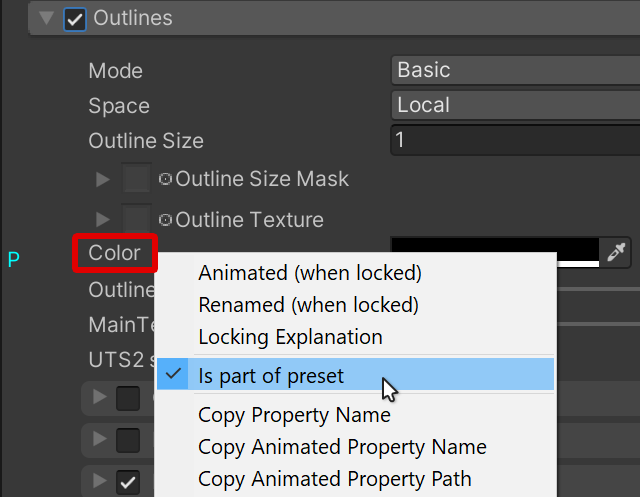
Tagging Preset Properties
In a similar manner to Marking Properties as Animated, Right-Click and in the context menu you will instead click Is part of preset. When you do this, a Light Blue colored P symbol will appear to the left next to it. This indicates that the property will be used in your Preset. Do this for each Property that you wish to use in your Preset.
Test Your New Preset
Once you finish marking your Properties as P, test it out by going to a Material you're using on your Avatar.
Just like as described in Using Presets, open the Preset List by pressing the Presets button, and your Preset should be seen in there. Select your Preset and Apply to your Material.
Congratulations! You now know how to create and apply your own Presets.
Advanced Per Section Presets
Optionally, you have the ability to make separate Sections of the Material serve as their own Presets as well. This can be enabled by turning on Preset per Section.
When enabled, the Material will now include it's own Preset Name field near the top of each individual Section.
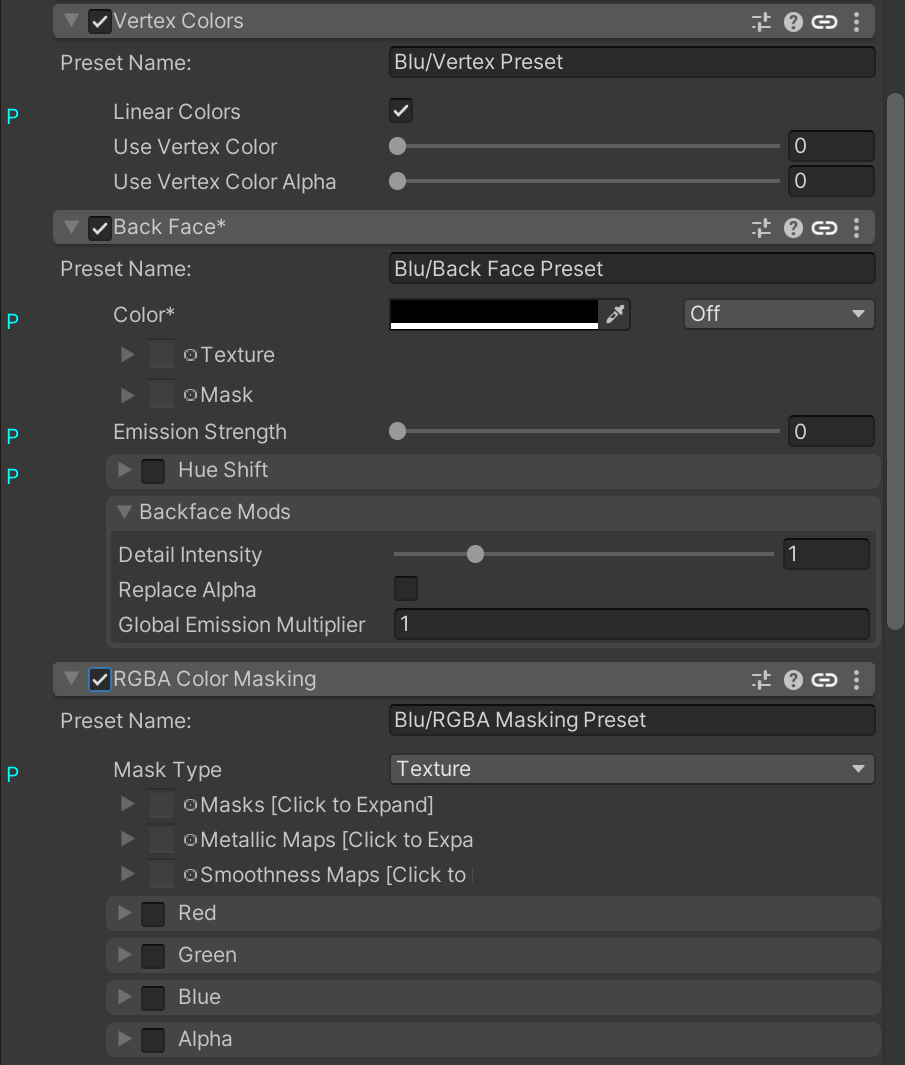
Example of what the UI looks like when Preset per Section is enabled.
As instructed from above, the workflow is still very much the same. The only difference however, is instead of the entire Material serving as a whole Preset, each Section is serving as their own additional amount of Presets. Therefore, each one used will appear separate from each other in the Presets List.